A clipping path is a vector outline drawn around a product to separate it from its background. Created with Photoshop's Pen Tool, it produces clean cutouts with pixel-perfect edges for ecommerce and marketing use.
If you sell products online, you've probably heard this term before. Amazon requires white backgrounds. Shopify recommends clean product photos. Your designer asks for "clipped" images. But what exactly is a clipping path, and why does it matter?
In this guide, you'll learn everything about clipping paths: what they are, how they work, the different types, and when you should use them. We'll also cover pricing so you know what to expect when hiring a professional service.
Quick Facts About Clipping Path
Tool Used
Photoshop Pen Tool
Industry-standard vector editing
Starting Price
$0.19/image
Professional hand-drawn paths
Turnaround
6-24 hours
Rush delivery available
Best For
Sharp-edged products
Electronics, shoes, furniture
Quality
100% Hand-drawn
Pixel-perfect edges, no AI
Revisions
Unlimited Free
Until you are satisfied
What Is a Clipping Path?
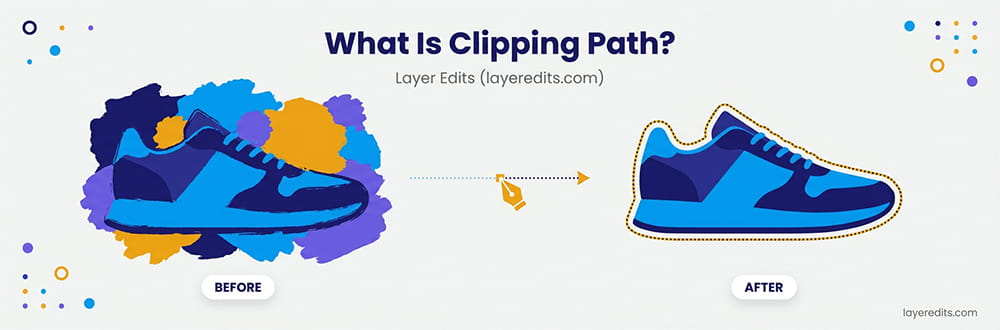
A clipping path is a closed vector outline that separates an object from its background. Think of it like using scissors to cut out a photo from a magazine. The path is your cutting line. Everything inside stays visible; everything outside disappears.
In technical terms, a clipping path is created using the Pen Tool in Adobe Photoshop. The editor draws anchor points around the object, connecting them with straight lines or curves. When completed, this path tells the software which pixels to keep and which to hide or delete.
Key Characteristics
- Vector-based: Made of points and curves, not pixels
- Scalable: Resize without losing quality
- Precise: Creates sharp, clean edges
- Manual process: Hand-drawn by skilled editors
- Non-destructive: Original image stays intact
The technique has been around since the early days of desktop publishing. In the printing industry, it's sometimes called "deep etching." Despite the rise of AI tools, hand-drawn clipping paths remain the gold standard for professional product photography.
How Does Clipping Path Work?
Creating a clipping path is straightforward, but it requires patience and skill. Here's the basic process:
Open Image in Photoshop
Load your product photo into Adobe Photoshop. Zoom in to see the edges clearly.
Select the Pen Tool
Press P on your keyboard or select it from the toolbar. The Pen Tool creates vector paths.
Draw Around the Object
Click to place anchor points along the object's edge. Drag to create curves. Work slowly for accuracy.
Close the Path
Connect the last anchor point to the first. The path must be closed to work as a clipping path.
Save as Clipping Path
In the Paths panel, right-click and select "Clipping Path." Save the file as PSD, TIFF, or EPS.
Use the Cutout
Place the image in InDesign, Illustrator, or export as PNG with a transparent background.
For smooth curves, use as few anchor points as possible. Too many points create jagged edges. Skilled editors can outline a simple product with just 10-20 anchor points.
Types of Clipping Path
Not all clipping paths are the same. The complexity depends on your product's shape. Here are the main types:
Basic Clipping Path
Used for products with simple, smooth edges. Think boxes, bottles, phones, or books. The outline is straightforward with minimal curves.
Examples: Smartphones, mugs, basic packaging, sunglasses, simple furniture
Medium Clipping Path
Products with more curves, multiple edges, or simple holes. Requires more anchor points and careful work.
Examples: Shoes, watches, handbags, grouped products, chairs with cutouts
Complex Clipping Path
Detailed products with intricate shapes, multiple holes, or overlapping elements. These take significant time and skill.
Examples: Jewelry with gemstones, bicycles, chains, wicker baskets, detailed machinery
Super Complex Clipping Path
The most challenging category. Products with hundreds of tiny holes, fine details, or areas that overlap in complex ways.
Examples: Chain-link fences, lace fabrics, trees and foliage, group photos with multiple products
| Type | Anchor Points | Time Required |
|---|---|---|
| Basic | 10-50 | 2-5 minutes |
| Medium | 50-150 | 5-15 minutes |
| Complex | 150-300 | 15-30 minutes |
| Super Complex | 300+ | 30-60+ minutes |
When Should You Use Clipping Path?
Clipping path works best for products with hard, defined edges. If your product has smooth curves and sharp corners, clipping path is your go-to technique.
Electronics
Shoes
Packaging
Watches
Furniture
Bags
Bottles & Mugs
Vehicles
Jewelry
When NOT to Use Clipping Path
Clipping path doesn't work well for soft edges. If your product has hair, fur, feathers, or transparent parts, you'll need image masking instead. A clipping path on hair will look choppy and unnatural.
Benefits of Clipping Path for Ecommerce
Why do professional sellers invest in clipping path services? Here are the key benefits:
Marketplace Compliance
Amazon, eBay, and other marketplaces require white backgrounds. Clipping paths let you replace any background with pure white (#FFFFFF).
Perfect Scalability
Vector paths scale to any size without losing quality. Your image looks sharp on thumbnails and large banners alike.
Background Flexibility
Once clipped, you can place your product on any background: white, gradient, lifestyle scene, or custom design. See our background removal service.
Clean Visual Appeal
Pixel-perfect edges make your products look professional. No halos, no jagged lines, no messy cutouts.
Brand Consistency
Every product image looks uniform. This creates a professional catalog and builds customer trust.
Higher Conversion Rates
Clean product photos boost buyer confidence. Studies show professional images increase conversions by 30% or more.
Clipping Path vs Image Masking
These two techniques often confuse people. Here's the simple difference:
Clipping Path
- Uses vector paths (Pen Tool)
- Creates hard, sharp edges
- Binary: pixel is visible or hidden
- Best for: solid products with defined edges
- Faster and cheaper
Image Masking
- Uses grayscale masks
- Creates soft, natural edges
- Gradual: pixels can be semi-transparent
- Best for: hair, fur, smoke, glass
- More time-consuming and expensive
Many products need both techniques. A leather jacket on a model? Use clipping path for the jacket's sharp edges and masking for the model's hair. Learn more in our guide on Clipping Path vs Background Removal.
AI Tools vs Hand-Drawn Clipping Paths
AI background removal tools are everywhere now. Remove.bg, Canva, Photoroom, and dozens of others promise instant results. Should you use them?
| Factor | AI Tools | Hand-Drawn Clipping Path |
|---|---|---|
| Speed | Seconds | Minutes to hours |
| Cost | Free - $0.10/image | $0.19 - $7.00/image |
| Edge Quality | Variable, often rough | Pixel-perfect |
| Consistency | Unpredictable | Highly consistent |
| Complex Products | Struggles | Handles well |
| Similar-Color Backgrounds | Often fails | No problem |
Our recommendation: Use AI for quick internal work or social media drafts. For customer-facing ecommerce images, especially on Amazon or Shopify, invest in professional hand-drawn clipping paths. The quality difference directly impacts your sales.
Clipping Path Pricing in 2026
Clipping path services typically charge per image based on complexity. Check our pricing page for detailed rates. Here's what you can expect:
Starting at
$0.19
per image — pricing varies by complexity
Most services offer volume discounts. If you're sending 100+ images, expect 10-25% off. Some factors that affect pricing:
- Product complexity: More curves and holes = higher price
- Turnaround time: Rush jobs cost 50% more for 12-hour delivery or 100% more for 6-hour, based on complexity
- Output format: Multiple formats may cost extra
- Additional services: Shadow creation, color correction, retouching
Layer Edits Pricing
We offer clipping path services starting at $0.19 per image with 6-hour rush delivery available. Every image is hand-edited by our team of 75+ Photoshop experts. Get a free quote for your project.
Frequently Asked Questions
Conclusion
A clipping path is one of the most essential techniques in product photography. By drawing a precise vector outline around your product, you can achieve clean cutouts, white backgrounds, and professional-looking images that boost sales.
Key takeaways:
- Clipping path creates sharp, clean edges using Photoshop's Pen Tool
- Best for products with defined edges: electronics, shoes, furniture, packaging
- Not ideal for soft edges like hair, fur, or transparency (use masking instead)
- Professional services start at $0.19 per image
- Hand-drawn paths deliver better quality than AI tools
Whether you're selling on Amazon, running a Shopify store, or creating marketing materials, clipping paths help your products stand out. And with services starting at just $0.19 per image, professional quality is more accessible than ever.
Choosing a clipping path provider? See our Layer Edits vs Path Edits comparison for a detailed pricing and quality breakdown.