If you sell products online or prepare images for catalogs, you've probably run into the clipping path workflow. It's the cleanest way to isolate a subject from its background — sharp, vector-based, and non-destructive. This guide walks you through the exact Pen Tool process our editors use every day.
We edit over 5 million images a year at Layer Edits, and the Pen Tool is still our go-to method for any product with clean, defined edges. AI tools are getting better, but for marketplace-ready output they still miss the mark on curves, reflections, and fine detail. Here's how to do it right.
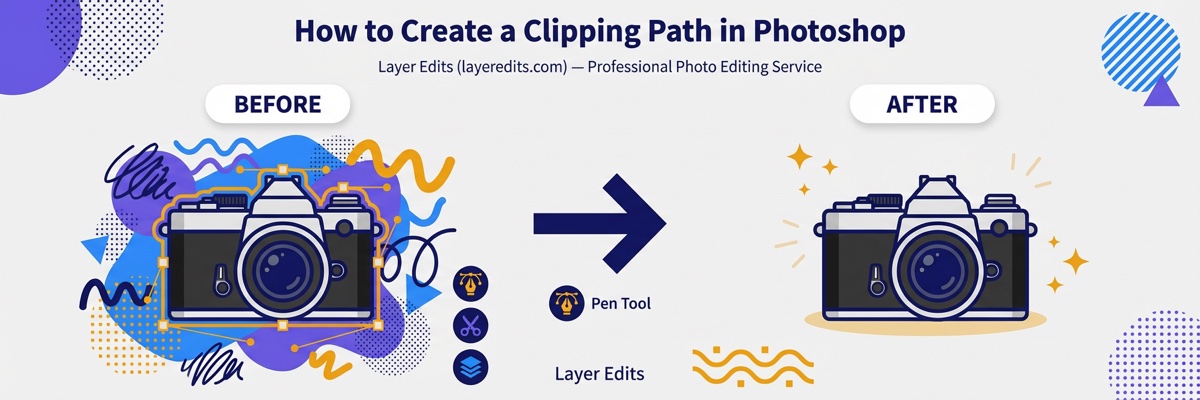
What Is a Clipping Path in Photoshop?
A clipping path is a closed vector outline drawn around a subject in Photoshop to isolate it from everything outside the path. Anything inside the path stays visible; anything outside becomes transparent when the file is placed in InDesign, Illustrator, or a browser.
Because the path is made of vector points and curves — not pixels — it scales without losing sharpness and produces clean, print-ready edges. That's why it's still the industry standard for e-commerce photography, catalog printing, and marketplace listings.
Key Characteristics
- Vector-based: infinitely scalable, no pixel softening
- Non-destructive: the original image stays untouched
- Sharp-edge friendly: ideal for products with clean contours
- Portable: readable in InDesign, Illustrator, QuarkXPress
- Editable: anchor points can be adjusted later with the Direct Selection Tool
Quick Facts
| Attribute | Detail |
|---|---|
| Primary Tool | Pen Tool (keyboard shortcut: P) |
| Starting Price | $0.19 per image (professional service) |
| Turnaround Time | 24 hours standard, 12 hours rush (+50%) or 6 hours (+100%) |
| Best For | Products with sharp, well-defined edges |
| File Formats | PSD, TIFF, EPS, JPG (with embedded path) |
| Skill Level | Beginner to intermediate (2 to 15 minutes per image) |
Before You Start: Setup & Pen Tool Configuration
Getting the setup right saves rework later. A rushed start is the single biggest reason beginner paths come out jagged or misaligned. Take two minutes here and the rest of the job goes smoothly.
1. Open and Prepare Your Image
Open your image (File > Open). If the layer shows as "Background" with a lock icon, double-click it to convert it into a regular layer. Duplicate the layer (Ctrl/Cmd + J) and rename the copy "Main Object" — you'll work on the copy and keep the original as backup.
2. Select the Pen Tool and Configure It
Pick the Pen Tool from the toolbar or press P. In the Options Bar at the top, switch the mode from "Shape" to "Path". Next to the path operations menu, make sure "Combine Shapes" is selected — not "Subtract Front Shape." That single setting controls whether your final path will cut out the subject or the background.
3. Zoom In for Accuracy
Use Ctrl/Cmd + + to zoom to 200–300%. At this level you can place anchor points directly on the pixel edge instead of guessing. For very fine details like hair or glass, zoom even further.
When you click and drag to create a curve, the length of the handle controls how hard the curve bends. Pull the handle about one-third the distance to your next anchor point — any longer and you'll overshoot the edge, any shorter and the curve looks flat. This one habit separates clean paths from amateur ones.
Step-by-Step: Drawing the Clipping Path with the Pen Tool
This is the heart of the job. Work slowly, follow the edge, and don't worry about perfection on the first pass — every anchor point is editable afterward with the Direct Selection Tool.
Step 1: Place Your First Anchor Point
Click once on the edge of your subject where you want the path to start. A small square appears — that's your first anchor. Pick a point that's easy to return to (a corner or a distinct feature) so you know where to close the path later.
Step 2: Add Corner Anchors for Straight Edges
For straight sections, just click (don't drag) at the next corner. A straight line connects the two points automatically. Keep anchor points as far apart as the shape allows — more points mean more opportunities for bumps.
Step 3: Use Click-and-Drag for Curves
For a curved edge, click on the edge and drag in the direction the curve flows. Two handles will extend from the anchor. Release when the curve segment matches the subject's contour. If the curve bulges outward, pull the handle back; if it dips inward, extend it.
Step 4: Break Handles at Sharp Transitions
When a smooth curve meets a corner, hold Alt/Option and click the last anchor point. This "breaks" the outgoing handle so the next segment starts clean. Without this step you'll get unwanted curved corners.
Step 5: Work Around the Entire Subject
Continue placing anchors along the edge, alternating clicks (corners) and click-drags (curves) as the shape demands. For a typical e-commerce product, expect 20–40 anchor points. Hair, jewelry, or translucent items will need more.
Step 6: Close the Path
When you return near the starting anchor, hover over it until a small circle appears next to the Pen cursor. Click once to close the path. A closed path is required — an open path won't convert into a valid clipping path.
Step 7: Refine with the Direct Selection Tool
Switch to the Direct Selection Tool (A) to adjust individual anchor points or handles. Drag points onto the exact edge, reshape curves, or delete unnecessary anchors. This is also where most beginners spend extra time the first few tries — that's normal.
Step 8: Double-Check the Outline
Zoom out (Ctrl/Cmd + 0) and scan the whole outline. Look for stray anchor points outside the subject, visible gaps, or sections where the path cuts into the product. Fix them now, before saving.
Photoshop auto-creates a temporary "Work Path" while you draw. If you start a new path without saving it, Photoshop overwrites the old one — and your 10 minutes of anchor work disappears. The moment your path is closed, save it (next section explains how).
Saving and Converting to a Clipping Path
A drawn path isn't a clipping path yet — it's a regular work path until you convert it. Two short steps lock it in.
Open the Paths Panel
Go to Window > Paths. You'll see your newly drawn outline listed as "Work Path" in italics — the italics mean it's temporary. Double-click "Work Path," give it a clear name like "Product Clipping Path," and click OK. The name is no longer italic, which confirms the path is saved.
Convert to Clipping Path
Click the Paths panel menu (the four-line icon in the top-right of the panel) and choose "Clipping Path...". In the dialog, select your saved path from the dropdown. Leave the "Flatness" field blank unless your print provider specifies a value — most modern RIPs handle it automatically.
Apply a Light Feather (Optional)
For slightly softer edges, right-click the path and choose "Make Selection...". Set the feather radius between 0.3 and 0.5 pixels. Anything higher starts looking blurry — especially on marketplace listings where Amazon and Shopify expect crisp edges.
Exporting: Best File Formats for Clipping Paths
Not every file format supports embedded clipping paths. Pick the wrong one and your carefully drawn path won't carry into InDesign, Illustrator, or your printer's workflow. Here's how each format behaves:
| Format | Preserves Path? | Best For | Notes |
|---|---|---|---|
| PSD | Yes | Layered editing, handoff to designers | Keeps layers and masks intact |
| TIFF | Yes | Print production, catalogs | High quality, widely supported by print shops |
| EPS | Yes | Legacy print workflows, Illustrator placement | Older but still used by some printers |
| JPG | Yes (with path) | E-commerce listings, web | Path embeds but JPG itself is not transparent |
| PNG | No | Transparent web images | Use a layer mask or alpha channel instead |
For print and catalog work, TIFF or EPS is the safest bet. For handing off to a designer, use PSD so they keep all your layers. For Amazon, Shopify, or your website, a flattened JPG with embedded path is usually enough — and if you want true transparency, use PNG with a layer mask instead of a clipping path.
Clipping Path Complexity and Time Benchmarks
How long a clipping path takes depends almost entirely on edge complexity — not image size. A 20-megapixel photo of a water bottle is faster than a 5-megapixel jewelry shot. These benchmarks come from our team of 75+ editors:
| Complexity | Anchor Points | Time (Skilled) | Examples |
|---|---|---|---|
| Basic | 10–25 | 2–5 minutes | Bottles, boxes, mugs, phones |
| Medium | 25–50 | 5–10 minutes | Shoes, bags, simple apparel |
| Complex | 50–100 | 10–20 minutes | Chairs with spindles, kitchenware, tools |
| Super Complex | 100+ (+ multiple paths) | 20–45 minutes | Jewelry, lace, bicycles, wire frames |
If your image includes hair, fur, or semi-transparent materials, a clipping path isn't the right tool — use image masking instead. For products with multiple separate parts that need different color treatments, go with multiple clipping paths.
Client Scenario: 200-Image E-commerce Shoot
A home-goods brand sent us 200 freshly shot product images — mostly bottles, boxes, and small appliances. Mix of basic and medium complexity. A solo editor would need roughly 20 hours. Our team finished the batch in under 24 hours with the standard $0.19/image rate, and the brand qualified for a volume discount on the order.
Common Mistakes to Avoid
After editing millions of images, we see the same handful of mistakes repeatedly. Catching them early saves hours of rework.
1. The Inverted Path (Background Kept, Subject Removed)
If the path looks correct but hides the wrong side, you likely started with "Subtract Front Shape" instead of "Combine Shapes." Select the path in the Paths panel, reset the path operation in the Options Bar, and the selection flips back.
2. Too Many Anchor Points
Beginners often place an anchor every few pixels. The path ends up bumpy because each anchor pulls the line slightly. Rule of thumb: use the fewest anchors that describe the shape. Straight edges need only two — the start and the end.
3. Forgetting to Save the Work Path
"Work Path" is temporary. If you draw a second path without saving the first, the original is gone. Always double-click to name and save before doing anything else.
4. Over-Feathering the Selection
Anything above 0.5 pixels of feather creates a noticeable soft edge. For marketplace listings (Amazon, Shopify, eBay), keep feather between 0.3 and 0.5 — the edges should look clean, not blurred.
5. Using Clipping Path on the Wrong Subject
Hair, fur, smoke, glass, and semi-transparent fabrics can't be isolated cleanly with a vector path. If your subject has these characteristics, you'll spend 45 minutes on a path and still get bad edges. Choose image masking for these cases — that's the whole reason it exists.
Skip the Paths panel menu for quick conversions. With the Pen Tool or Direct Selection Tool active, right-click anywhere on the path and choose "Make Selection…" directly. Set your feather value in the same dialog and you're done — three clicks instead of six.
DIY vs. Outsource: When to Hand It Off
Doing a clipping path yourself is free in cash but expensive in time. The honest math: how much is an hour of your time worth compared to $0.19 per image? For small batches it's fine to DIY. For anything past 20–30 images a week, outsourcing pays for itself.
Clipping Path Pricing at Layer Edits
Starting at $0.19 per image for basic to medium complexity. Complex work (jewelry, chairs, wire frames) is quoted based on the number of paths needed.
- 24-hour standard turnaround — rush in 12 hours (+50%) or 6 hours (+100%) based on complexity
- 99.5% first-time approval on delivered images
- Volume discounts: up to 25% off for 1,000+ image orders
- Unlimited free revisions until you're satisfied
When DIY Makes Sense
- You're editing 1–10 images occasionally for personal projects
- You need full creative control and have time to spare
- The subject is simple (boxes, bottles, phones) and you already know Photoshop
When Outsourcing Wins
- You shoot product photos weekly and need 50+ images edited on deadline
- Your subjects include jewelry, apparel, or any complex edges
- You need consistent output across an entire catalog
- Your time is better spent on selling, shooting, or growing the business
Most of our clients start with a free 2-image trial to see the quality before committing to a larger order. If you're comparing options, our clipping path vs. image masking guide and the complete clipping path overview cover the rest of what you'll want to know. You can also see full rates on our pricing page.
Frequently Asked Questions